You need clean, reliable water for your operations. But understanding the complex process of drilling a well can feel overwhelming, right? I've seen firsthand how unclear steps lead to costly delays and frustration.
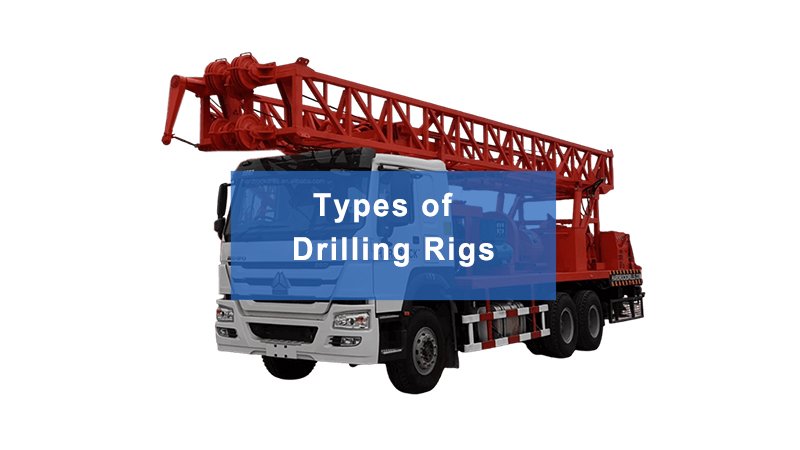
A water well drilling rig1 works by systematically preparing the site, setting up the equipment, drilling an initial pilot hole, enlarging it, installing casing to prevent collapse, developing the well to maximize water flow, and finally installing a pump system. Each phase is critical for a functional and long-lasting water source.
Now that we have a clear overview, let's break down each step in detail. From the moment we arrive on site until clean water flows, every action is carefully planned and executed.
How Do We Prepare a Site for Water Well Drilling?
Starting a drilling project without proper site prep is like building on sand. Have you considered all the hidden obstacles and potential hazards that could derail your efforts?
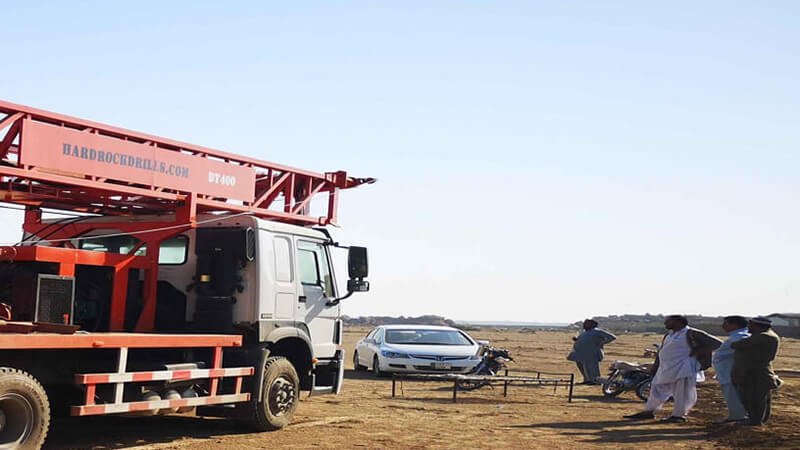
Preparing a site for water well drilling involves surveying the area, clearing obstructions, leveling the ground for rig stability, ensuring access for machinery, establishing a water source for drilling fluids, and identifying underground utilities to prevent accidents.
Site preparation is more than just clearing some bushes; it's laying the groundwork for a safe and efficient operation. My team and I always start with a thorough reconnaissance. First, we identify the exact drilling location, often guided by geological surveys or hydrogeological reports. Once the spot is confirmed, the real work begins. We need to clear the chosen area of any vegetation, rocks, or debris that might impede the rig's operation or pose a safety risk. This often involves heavy machinery. Next, creating a stable, level pad for the drilling rig is paramount. A rig weighing tens of tons needs firm ground to prevent tipping or sinking, especially during drilling. We might bring in fill material or compact existing soil to achieve this.
Key Considerations for Site Preparation:
- Accessibility: Ensure wide and stable access roads for heavy equipment like the drilling rig, water trucks, and support vehicles. This might mean temporary road construction or reinforcement.
- Water and Power: Plan for a water source, whether it's a nearby pond, a municipal connection, or trucked-in water, as drilling requires significant amounts of water for circulation and cooling. Consider power needs for ancillary equipment if not directly from the rig's engine.
- Safety and Environmental: Mark all known underground utilities (water, gas, electrical lines) to prevent accidental strikes. Set up designated areas for material storage, waste disposal, and personnel safety zones. Implementing erosion control measures and managing drilling fluid runoff are also critical environmental responsibilities. Neglecting any of these aspects can lead to delays, increased costs, or even serious accidents. I've personally seen projects halted for days because an unmarked utility line was accidentally hit. It's a lesson learned the hard way.
How is the Water Well Drilling Rig Assembled and Made Ready?
A powerful drilling rig is impressive, but it's useless if not set up correctly. Are you confident your team knows the critical steps to safely and effectively prepare it for operation?
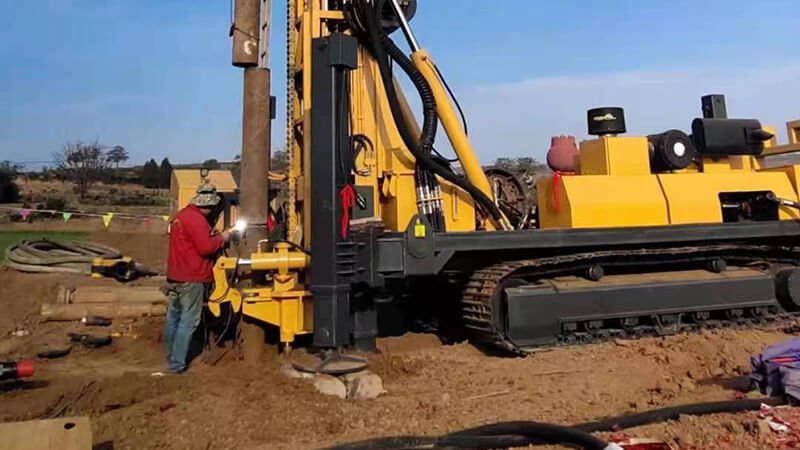
Rig setup involves carefully positioning the drilling unit on the prepared pad, extending and leveling its outriggers for maximum stability, raising the drilling mast, connecting all hydraulic and electrical systems, and preparing the drilling fluid circulation system2.
Once the site is ready, the drilling rig itself needs to be meticulously prepared. This phase is critical for both operational efficiency and safety. My team begins by carefully maneuvering the rig into the exact drilling position. This often requires skilled operators, especially on challenging terrain, to ensure the drill bit will align precisely with the intended well location. Precision here prevents costly adjustments later. After positioning, the rig's outriggers, which are hydraulic legs, are extended and adjusted. These outriggers bear the immense weight of the rig and the drilling forces, distributing the load evenly and ensuring the rig remains perfectly level. This prevents any swaying or instability during drilling, which could lead to a crooked borehole or even a rig overturning incident. Leveling is checked with precision instruments.
Rig Setup Checklist:
- Mast Raising: The drill mast, which holds the drill string and derrick, is hydraulically raised into its vertical drilling position. This process requires clear communication and a keen eye for safety, as the mast can be very tall and heavy.
- System Connections: All hydraulic hoses for power, rotation, and feed systems are securely connected and checked for leaks. Electrical connections for lights, controls, and ancillary equipment are also verified.
- Drilling Fluid System: For rotary drilling, the mud pump system is readied. This includes ensuring the mud pit (or tanks) is clean, connecting suction and discharge lines, and preparing the initial drilling fluid mixture. This mixture, often called "drilling mud," plays a vital role in cooling the bit, carrying cuttings to the surface, and stabilizing the borehole.
- Safety Checks: Before any drilling begins, a comprehensive safety check is performed. This includes testing all emergency stops, checking pressure gauges, verifying communication systems, and ensuring all personnel are aware of safety protocols and exclusion zones. I insist on these checks; they save lives and prevent equipment damage.
How Do We Start Drilling the Initial Pilot Hole?
You can't just plunge into the ground with a large bit. The first cut is the most important, but do you know why a smaller pilot hole is essential for success?
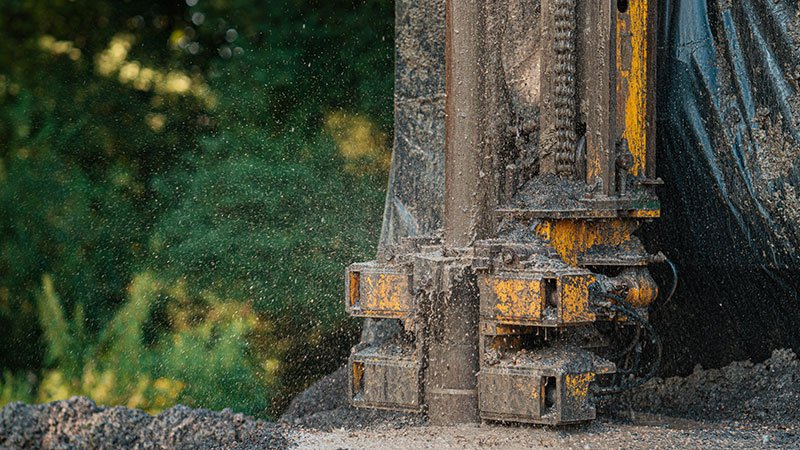
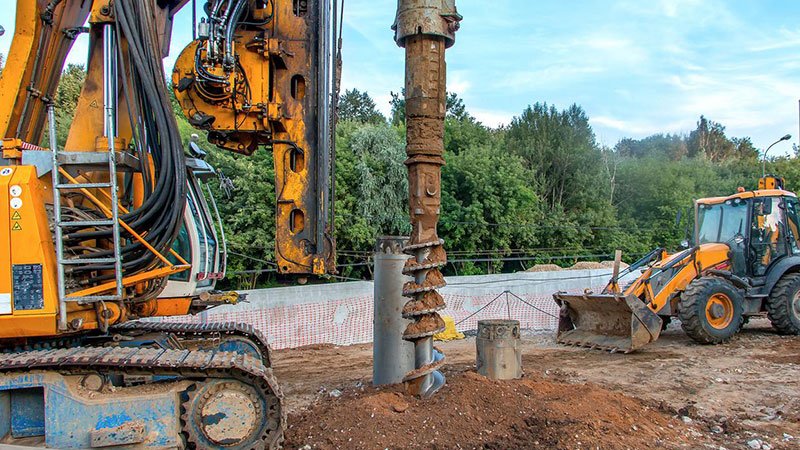
Drilling the pilot hole3 involves using a relatively small diameter drill bit to create the initial borehole, typically 6 to 8 inches in diameter. This step confirms the geological formations, identifies water-bearing zones, and guides the subsequent reaming process.
The pilot hole is the critical first step in actually penetrating the earth. It's like drawing the first line before sketching a detailed drawing – it sets the path. We begin by attaching a smaller diameter drill bit, usually a tricone or drag bit depending on the expected formation, to the drill collar and the first section of drill pipe. The bit is then positioned precisely over the marked drilling spot. As the rotary table or tophead drive begins to spin the drill pipe, weight is applied to the bit, allowing it to cut through the surface layers. This initial phase requires careful control of rotational speed and applied weight (WOB - Weight On Bit) to ensure a straight and accurate borehole from the very start.
Key Aspects of Pilot Hole Drilling:
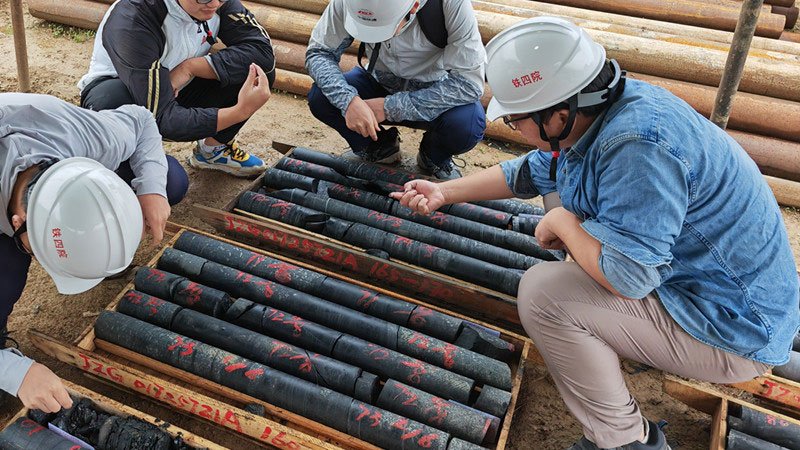
- Formation Identification: As the drill bit cuts, the drilling fluid (mud or air) circulates down the drill pipe, exits through nozzles on the bit, and returns to the surface carrying rock cuttings. These cuttings are meticulously examined by the drilling crew or a geologist. They provide crucial information about the different geological layers encountered, such as sand, gravel, clay, shale, or bedrock. This helps confirm the subsurface conditions anticipated from initial surveys.
- Water Zone Confirmation: The presence of water, increased moisture in cuttings, or changes in drilling parameters can indicate potential water-bearing aquifers. This is a critical observation, guiding decisions for future well design.
- Borehole Stability: The drilling fluid not only brings cuttings to the surface but also stabilizes the borehole walls, preventing them from collapsing, especially in loose or unconsolidated formations. Maintaining proper fluid properties (viscosity, density) is essential for this.
- Depth and Straightness: The pilot hole continues until the desired depth is reached, often past the anticipated water-bearing zone. Throughout this process, the crew constantly monitors the depth, penetration rate, and the straightness of the hole using various instruments. A straight pilot hole ensures easier reaming and casing installation later. I always tell my team, "A good pilot hole makes the rest of the job easier and safer."
How Do We Enlarge the Borehole to its Final Diameter?
Your pilot hole is just a guide; the real work often begins when you need to make it larger. But do you know the best way to expand a borehole efficiently and safely?
Reaming involves enlarging the pilot hole to the required final diameter using progressively larger drill bits or specialized reamer tools. This process prepares the borehole to accommodate the well casing and ensures proper space for the gravel pack.

Once the pilot hole is successfully drilled, the next step is to enlarge it to the final desired diameter. This process is called reaming. The final size of the borehole depends on the diameter of the well casing that will be installed. For instance, if a 6-inch pilot hole was drilled and an 8-inch casing is needed, the hole must be reamed to at least 10 or 12 inches to allow space for the casing and any necessary gravel pack. Reaming can be done in a single pass with a large bit, or in multiple passes with progressively larger bits, especially in hard rock formations. The drill bit used for reaming is often a larger version of the pilot bit, or a specialized hole opener designed for efficient enlargement.
Techniques and Considerations in Reaming:
- Bit Selection: Choosing the correct reamer or bit is crucial. Factors like formation type (soft, medium, hard rock), desired final diameter, and available rig power influence this choice. PDC bits might be used in softer formations, while tricone bits are common in harder rock.
- Controlled Progression: Reaming requires careful control of drilling parameters, similar to pilot hole drilling. This includes maintaining appropriate rotational speed, weight on bit, and drilling fluid circulation. Too much weight or speed can lead to bit wear or deviation, while too little can make the process slow and inefficient.
- Hole Cleaning: Effective hole cleaning is even more critical during reaming due to the larger volume of cuttings generated. The drilling fluid must be capable of lifting these larger cuttings to the surface to prevent them from accumulating at the bottom of the hole, which could jam the bit or cause the drill string to get stuck. My team constantly monitors the flow of drilling fluid and the nature of the cuttings to ensure efficient removal.
- Borehole Stability: As the hole is enlarged, maintaining its stability is paramount. The drilling fluid helps here by creating a filter cake on the borehole walls, preventing collapse, especially in unconsolidated formations like sand or gravel. Any signs of instability, such as excessive caving, require immediate attention and adjustment of drilling parameters or fluid properties. A well-reamed hole provides a stable foundation for the next critical step: casing installation. I always say, "Reaming properly is like carving a perfect mold; it sets the stage for a flawless cast."
How Is the Well Casing Placed and Secured in the Borehole?
You've drilled a perfect hole, but what good is it if it collapses? Casing is your well's backbone, but do you know the precise steps to install it correctly for lasting integrity?
Casing installation involves lowering sections of steel or PVC pipe into the enlarged borehole, precisely aligning them to form a continuous conduit. Screens are placed at water-bearing zones to allow water entry while keeping out sediment, then the annular space is typically sealed.
After the borehole has been drilled and reamed to the correct size, the next critical step is to install the well casing. This casing acts as the structural integrity of the well, preventing the borehole walls from collapsing, isolating different aquifer zones, and protecting the water quality from contamination by surface water or undesirable shallow aquifers. Typically, the casing is made of steel or PVC, with the choice depending on factors like depth, water quality, and budget. Each section of casing pipe is carefully inspected before being lowered into the hole.
Process of Casing Installation:
- Pipe Inspection and Connection: Individual casing sections, often 20 feet long or more, are brought to the rig site. Each section is visually inspected for damage or defects. Then, they are lifted and carefully threaded together, one by one, using specialized wrenches or power tongs. Ensuring a tight and secure connection is vital, as any loose joints could compromise the well's integrity.
- Lowering the Casing: As each section is added, the entire string of casing is slowly lowered into the borehole. This requires precision and often the use of a casing elevator or spider to hold the string. Centralizers, which are devices attached to the outside of the casing, are often installed along its length. These help to keep the casing centered within the borehole, ensuring an even annular space around it for subsequent gravel packing or grouting.
- Screen Placement: Crucially, perforated sections of casing, known as well screens, are strategically placed to align with the identified water-bearing aquifers. These screens have slots or openings that allow water to enter the well while holding back sand, gravel, and other sediment from the aquifer, preventing them from entering the wellbore.
- Gravel Pack and Grouting: Once the casing and screen are in place, the annular space (the gap between the casing and the borehole wall) is typically filled. In many water wells, a "gravel pack" is installed around the screen section. This consists of carefully sized sand or gravel, which acts as a secondary filter to prevent fine sediments from entering the well. Above the screen and gravel pack, the annular space is sealed with bentonite clay or cement grout. This "grouting" prevents surface water contamination from migrating down the borehole and isolates different aquifer zones, ensuring the purity of the target aquifer. I remember one job where we had to pull out over 100 feet of casing because of a small crack we missed in inspection; that taught us the importance of thoroughness in this phase.
How Do We Enhance Water Flow and Purity in a Newly Drilled Well?
Your well is cased, but is it truly ready for clean, abundant water? Many overlook this critical step, leading to disappointing yields. Are you optimizing your well's performance from day one?
Well development4 is the process of cleaning the well and surrounding aquifer to maximize water yield and remove drilling-induced damage. It involves techniques like surging, bailing, jetting, or air-lifting to clear fine particles and optimize the flow of water into the well.
After the casing and screen are installed, the well is not yet ready for continuous pumping. The drilling process itself, with its use of drilling fluids and mechanical action, often leaves behind a "skin" of fine particles and drilling mud residue on the borehole walls and within the aquifer immediately surrounding the screen. This residue can significantly reduce the well's efficiency and water yield. Well development is the crucial process of removing these fine materials and establishing a good hydraulic connection between the aquifer and the well screen.
Methods and Objectives of Well Development:
- Surging and Bailing: One common method involves repeatedly moving a surge block (a plunger-like device) up and down within the casing. This creates rapid changes in water pressure, forcing water in and out of the screen, which dislodges fine particles from the aquifer and brings them into the wellbore. These suspended particles are then removed by bailing or pumping.
- Air-Lifting: Air-lifting uses compressed air injected into the well to create a mixture of air and water that is lighter than the surrounding water column. This mixture rises to the surface, bringing with it suspended sediments. The intermittent nature of air-lifting creates a surging action, further dislodging particles from the aquifer.
- High-Pressure Jetting: In some cases, a high-pressure jetting tool is lowered into the well. Water is pumped at high pressure through nozzles that direct powerful jets outwards, through the screen, and into the aquifer. This effectively breaks up and flushes out fine materials from the filter pack and surrounding formation.
- Pumping: Controlled pumping, often with a temporary pump, is used to draw water from the well, gradually increasing the pumping rate. This helps to stabilize the aquifer and remove any remaining suspended solids until the water runs clear.
- Objectives: The primary goals of well development are to maximize the well's specific capacity (the amount of water produced per unit of drawdown), minimize sand production, reduce pump wear, and ensure the delivered water is free of suspended solids. A well that is not adequately developed will likely yield less water, require more frequent maintenance, and have a shorter operational lifespan. I consider this phase the "detox" of the well; it cleanses it for optimal performance.
How is the Water Pump System Installed for Operation?
The well is complete, but it's just a hole until water flows freely. Installing the pump is the final, vital step, but do you know how to ensure it's reliable and efficient for years to come?
Pump installation involves selecting the correct submersible or jet pump based on well depth and water demand, lowering it into the well at the optimal depth, connecting it to the power supply and discharge piping, and then testing the entire system for proper operation.
The final step in bringing a water well into full operation is the installation of the pump system. Without a pump, the drilled well is simply a hole in the ground; it cannot deliver water to the surface. The type of pump chosen depends on several factors: the well's depth, the desired flow rate, the water quality, and the available power source. Common types include submersible pumps (placed directly in the water inside the casing) and jet pumps (typically located above ground, drawing water up). My experience has shown that picking the wrong pump can lead to constant headaches and inefficiency.
Key Steps in Pump Installation:
- Pump Selection and Sizing: This is paramount. The pump must be sized correctly to the well's yield and the user's water demand. This involves calculating total dynamic head (TDH), which includes vertical lift, friction losses in piping, and desired pressure at the discharge point. An undersized pump won't meet demand, while an oversized pump can lead to premature well drawdown and reduced pump life.
- Lowering the Pump: For submersible pumps, the pump, motor, and discharge pipe are assembled. Electrical wiring is carefully spliced and waterproofed, and a safety rope or cable is attached to the pump for retrieval. The entire assembly is then slowly lowered into the well casing to the predetermined setting depth, which is typically below the expected pumping water level but above the well screen to prevent drawing air or excessive sediment.
- Connecting Components: Once the pump is at depth, the wellhead is assembled at the surface. This involves connecting the discharge pipe to the main water line, installing pressure tanks, pressure switches, control boxes, and any necessary valves (like check valves to prevent backflow). Electrical connections from the pump motor to the power source and control panel are made and thoroughly insulated.
- System Testing and Commissioning: Before final handover, the entire pump system undergoes rigorous testing. This includes:
- Initial Start-up: Checking for proper motor rotation and immediate water flow.
- Pressure Monitoring: Ensuring the system builds and holds pressure correctly.
- Flow Rate Verification: Measuring the actual water output to confirm it meets specifications.
- Leak Detection: Inspecting all connections for any leaks.
- Cycle Testing: Running the pump through several on/off cycles to ensure the pressure switch and controls operate reliably.
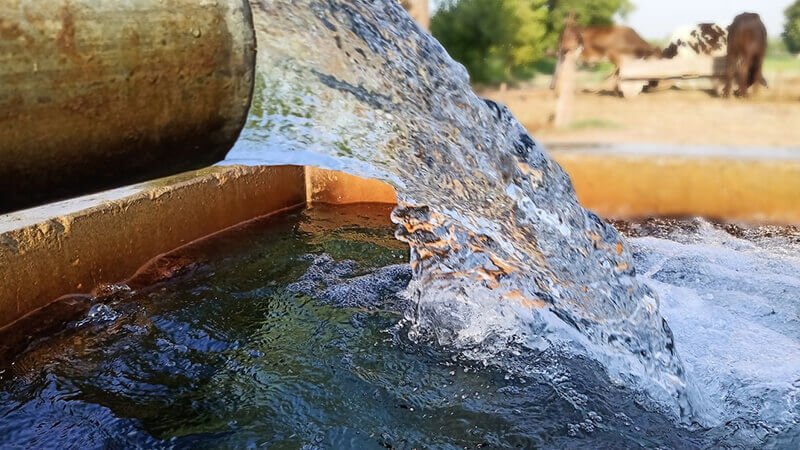
This final step ensures that the well is not just drilled but fully functional, delivering clean, reliable water as intended. I always stay until I see that clear, steady stream of water – it's the culmination of all our hard work.
Conclusion
A successful water well drilling project follows these seven critical steps systematically. Proper execution at each stage ensures a productive and long-lasting water well.
-
Learn more about water well drilling rig from Hardrock. ↩
-
A well-prepared drilling fluid circulation system is crucial for effective drilling. Discover its significance and operation through this informative resource. ↩
-
Understanding the significance of a pilot hole can enhance your drilling techniques and ensure successful outcomes. ↩
-
Understanding well development is essential for maximizing water yield and ensuring your well operates efficiently. Explore this resource to learn more. ↩